Posts

Showing posts with the label Stamparatus

MARKERS TECHNIQUE TO CREATE FALL WITH WINTER WOODS - October Stamp Camp

Image
Happy Fall, Stampers!    I've seen a couple of versions of a color-layering technique with this set and the Stamparatus, one or two with Sponge Daubers and Patty Bennett has a video tutorial (using mostly greens) with Stampin' Write Markers.  You can find it here .     Basically, you just use any colors you want - we used colors for Fall - place your stamp where you want it on your card front, pick it up with your Stamparatus and off you go!  Your Simply Shammy or baby wipes will come in handy, too.        NOTE:  Color the tree trunks last, just in case your paper inadvertently moves a little. More here ... Happy Stampin’! Sue Duffy ~ mandsduffy@comcast.net Happy Stampin’!

STAMPIN' UP! VARIATION ON CATALOG SAMPLE - SAILING HOME BUNDLE - June Stamp Camp

Image
Hi, Stampers!      We made this version of a Sailing Home SU! Annual Catalog sample (p.144).  The sample background was made with the Come Sail Away Memories & More Card Pack (p.145), but I don't have that, so we improvised using the retired TIEF, Seaside, because I don't have the new High Seas 3D Embossing Folder, either! (p.198).  So, you may ask, is this really a CAS of the Sample?  About as close as I could get with what I had.  ;-)  See?  You don't have to have every single product in order to create.  Please comment or email for a FREE Project Sheet!     Let's get started.    Happy Stampin’! Sue Duffy ~ mandsduffy@comcast.net

WATER, WATER EVERYWHERE.... STAMPIN' UP! SAILING HOME, A LITTLE BRUSHO "ART PIECE"

Image
Hi, Stampers!     Playing around again with this easy brushing Brusho technique (see my May 4 post) .  This time I added some extra water droplets from my Aqua Painter for a little more interest.  Don't be afraid to experiment - try it, you'll love it! Happy Stampin’! Sue Duffy ~ mandsduffy@comcast.net Details      The base is a vertical A2 card of Whisper White Thick CS, and the mat layer is also WW Thick, cut with the largest of the Stitched Rectangle dies. My "art piece" is 2-3/4 x 3-3/4 Watercolor Paper.      I sprinkled Prussian Blue and Yellow Brusho onto the Watercolor Paper and spritzed with water and brushed it with my Aqua Painter, blending the colors a little in the middle.  I then added droplets of water from my Aqua Painter here and there, dabbed off a little excess with a napkin, and let dry.      The sailboat and birds are stamped in Night of Navy, using my Stamparatus, in case I had to re-stamp.  When I made sure the stamped images w

STAMPIN' UP! NINE LIVES - REVERSE IMAGE STAMPING WITH STAMPARATUS©

Image
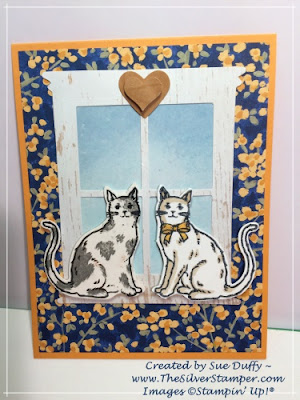
Hello, Stampers!      It's been a while.  I've had some personal and personalized cards to catch up on - this will be one of them for the anniversary of our good friends back in NYS.      I know there are some terrific YouTube videos out there for reverse stamping with the Stamparatus, but I wanted to show you my way, although pretty amateurish - I don't do videos - no talent in that regard.  Anyway, I'm going to provide you instructions on how to do the reverse stamping of these Nine Lives cats and then I will give you the particulars on the rest of the card.  So, here we go - bear with me.... Happy Stampin’! Sue Duffy ~ mandsduffy@comcast.net Add a Silicone Mat as your top layer on your Stamparatus - Figure 1.  Punch out a cat from some light colored scrap card stock - not black, and add to Stamparatus, as shown.  This is your template.. Line up your cat stamp in the punched opening and pick up with your Stamparatus plate - Figures 2 and 3.

STAMPIN' UP!'s HAPPY TAILS for Birthday (SNEAK PEEK) - April Stamp Camp - RGB CODES

Image
Hello, Stampers!      I will be hosting Stamp Camp next Saturday, April 13, at 10 AM, here in Mooresville, IN.  I you are local (including Indianapolis) and would like to join us, let me know by the end of the day, Monday (April 8).  Now, on to this card.       You know, sometimes we are not thrilled about an upcoming birthday - the older we get, especially - been there, done that.  I've mentioned before, that I've been starting to print my own, original  sentiments for the inside of a card.  So, we will use one of my original sentiments for this Happy Tails, "not so thrilled to be having a birthday" card.             TIP:   D id you know that you can use color codes to match SU! colors when creating a document or online?   After over 10 years as a Demonstrator, I finally found out about it - I never asked - who knew?  They are called RGB/HEX codes - and numbers correspond to each color. HEX for online use and RGB for MSWord or other software.  A generous, ta

STAMPIN' UP'S LET IT RIDE - ALCOHOL WESTERN SKY

Image
Howdy, Stampers!      I love horses, and today's card is a shameless CASE from a post on Pinterest by Jacquelyne Laburda, an artist in British Columbia.  I shamelessly used the same colors on my background, which brings to my mind sunset in big sky country.  It's actually pretty simple to do, so let's get started! Happy Stampin’! Sue Duffy ~ mandsduffy@comcast.net Details 1/4 sheet Glossy White CS (you can trim to 5 x 3-3/4 later); Basic Black CS 5-1/4 x 4 for mat; Whisper White Thick CS for base. Wet some large cotton balls (1 for each color) with rubbing alcohol (70% is fine) and add a drop of refill to each of Calypso Coral, Lovely Lipstick and Gorgeous Grape.  Lightly wipe or drag each color across the Glossy CS until you've achieved the look you want.  Try to avoid puddling and don't hesitate to practice on some Glossy CS scraps.  The cotton balls will stay wet for a while. When the glossy is dry, using the Stamparatus , stamp the galloping ho

STAMPIN' UP!® FLOWERING DESERT NOTE CARD - February 2019 STAMP CAMP

Image
Hola, Stampers!      Okay, so I really like the Flowering Desert set in the Occasions Catalog.  ;-)  I wanted to do something with some non-traditional colors because I thought that reflected the sentiment, "be your own kind of beautiful."   So, let's get started! Happy Stampin’! Sue Duffy ~ mandsduffy@comcast.net Instructions Sponge an area with Mango Melody on a Whisper White or Vanilla Note Card *Stamp saguaro cactus in Bermuda Bay or Pool Party, make smaller cactus by stamping parts with Flirty Flamingo, stamp yucca or aloe plant in Granny Apple Green or Lemon Lime Twist, and small yucca stems in Flirty Flamingo Punch out small flowers in Mango Melody CS, OR Grapefruit Grove Foil; add 1/" circle centers punched from Bermuda Bay CS and add flowers with Mini Glue Dots. Stamp sentiment in Bermuda Bay.  Stamp whatever you like on the inside of the note and on the envelope.  That's it!      *I suggest using your Stamparatus in case you need t

STAMPIN' UP!© HOME TO ROOST FUN FOLD WITH BUFFALO CHECK - February 2019 Stamp Camp

Image
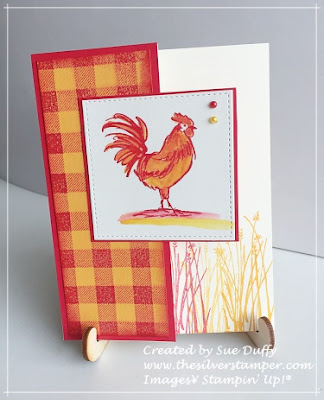
Hi there, Stampers!      The focal point on this type of fun fold card can be pretty much anything you want - circle, square, rectangle - and it is so easy to make!  Let's get started. Happy Stampin’! Sue Duffy ~ mandsduffy@comcast.net Measurements Card Base is Very Vanilla Thick CS trimmed to 6-1/2 x 5-1/2, score at 4-1/4 Poppy Parade CS 5-1/5 x 2-1/4 and a second piece 2-3/4 square (or whatever shape and size you prefer); focal point is Shimmery White CS Mango Melody CS is 2 x 6 - leave this piece at approx. 6" so you don't need to place it at the very top of your Stamparatus; after stamping trim to 5-1/4"

WREATH/CIRCLE-STAMPING WITH THE STAMPARATUS - PERENNIAL BIRTHDAY WREATH, Feb. 2019 Stamp Camp

Image
Hello, Stampers!      This floral wreath card can be created in just about any color you choose.  If you want to accent with the Gingham Gala DSP as we did here, use Highland Heather, Balmy Blue, Grapefruit Grove, Daffodil Delight or Lemon Lime Twist for your flowers or leaves and buds.  This wreath is stamped with the individual stamps in Perennial Birthday.      The card base is a simple WW Thick, vertical cut/score.  The wreath is stamped on a piece of 4x4 Whisper White with a 4-1/8 square mat in Highland Heather.  The Gingham DSP is 1-1/4 x 4-1/4. Instructions and template are below .   Let's get started! Happy Stampin’! Sue Duffy ~ mandsduffy@comcast.net

STAMPARATUS© CARRY BAG - JUST IN TIME FOR CHRISTMAS!

Image
AVAILABLE TO ORDER WEDNESDAY, DECEMBER 5! HOST CODE VDWQS3W4 #149695  $29 Hi, Stampers!      As of December 5, you can order this handy bag for carting or storing your Stamparatus, extra plates, Foam Mat, Small Grid Paper pad, etc.  I don't travel with my Stamparatus much, but I'm looking forward to this bag for storing Stamparatus and extra plates.  What a perfect gift for you from you or for your Stamparatus-owning friends.  Remember, I have GIFT CERTIFICATES!  Just contact me for details.      Speaking of extra plates, don't forget that Stampin' Up! now offers additional accessories for Stamparatus - extra plates, Small Grid Paper, extra Foam Mats and Magnets.  Sue Duffy ~ www.TheSilverStamper.com mandsduffy@comcast.net Stamparatus [ 146276 ] $49.00 Stamparatus® Plates [ 149693 ] $15.00 Stamparatus® Foam Mat [ 150081 ] $3.00 Stamparatus Magnets [ 148213 ] $12.00 Stampara

STAMPARATUS® ACCESSORIES AVAILABLE OCTOBER 1!

Image
Hi, Stampers!      On Monday, October 1, Stampin' Up! will have available for order the following accessories for your Stamparatus®: SMALL GRID PAPER  Grid paper perfectly sized,* for precision stamp alignment every time. (50 sheets) 149621 $6.50  Double-sided - inches on one side and metric on the other.  Any lines will help for placement *For those of us who are somewhat OCD?  👍 STAMPARATUS® PLATES  Additional plates allow you to have multiple stamp arrangements ready to go!  (2 plates) 149693 $15 FOAM MAT  Extra foam mat for photopolymer stamping. (1 mat) 150081 $3.00  ACCESSORIES PACK Includes Stamparatus® plates, grid paper, foam mat. 151049  $24.50 Extra Magnets.  Boy, these things are strong!  (2 magnets) 148213  $12 NOTE: Rare earth magnets are great but are brittle by nature, so keep them apart.  In fact, I generally use only one at a time on my projects. Sue Duffy ~ mandsduffy@comcast.net All images ©Stampin’ Up!®