STAMPIN' UP! NINE LIVES - REVERSE IMAGE STAMPING WITH STAMPARATUS©
Hello, Stampers!
It's been a while. I've had some personal and personalized cards to catch up on - this will be one of them for the anniversary of our good friends back in NYS.
I know there are some terrific YouTube videos out there for reverse stamping with the Stamparatus, but I wanted to show you my way, although pretty amateurish - I don't do videos - no talent in that regard. Anyway, I'm going to provide you instructions on how to do the reverse stamping of these Nine Lives cats and then I will give you the particulars on the rest of the card. So, here we go - bear with me....
Happy Stampin’!
Sue Duffy ~
mandsduffy@comcast.net
Sue Duffy ~
mandsduffy@comcast.net
- Add a Silicone Mat as your top layer on your Stamparatus - Figure 1. Punch out a cat from some light colored scrap card stock - not black, and add to Stamparatus, as shown. This is your template..

- Line up your cat stamp in the punched opening and pick up with your Stamparatus plate - Figures 2 and 3.


- Ink your stamp with Memento ink and stamp in the cat opening - YES, you are transferring ink to the Silicone Mat - Figures 4 and 5. Check to be sure you can easily see the image on your Silicone Mat - if not, just add more ink and stamp again.


- Gently lift a portion of your punched cardstock template and place a piece of white or vanilla cardstock under your template and be sure template is back in place - Figure 6. Without re-inking your stamp, "stamp" in the cat opening and press well. You want to transfer the ink that is on the Silicone Mat onto the back side of your cardstock Because you will still have some ink left on your stamp, you will be able to see the image on top, as well - Figure 7.


- Remove cardstock and you will have a reverse image on the back side! Because there was leftover ink on the top side, you will be able to line up your punch and then just flip the punched cat over. Ta dah! If you have any questions at all, please leave a comment or feel free to contact me by email..

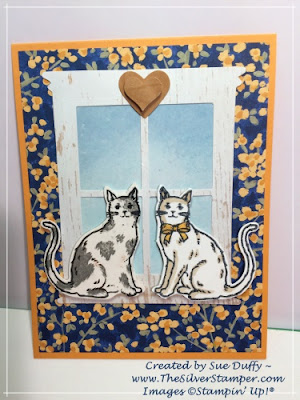
The card base is Mango Melody, 4-1/4 x 11, scored at 5-1/2. The DSP "wallpaper" is 5-1/4 x 4, from the 6x6 Garden Impressions stack. The window is die-cut from Wood Textures DSP with the retired window Framelits.
The sky is Glossy White CS, roughly 3 x 4, sponged in Balmy Blue and Night of Navy and adhered to the frame around edges with liquid glue. The cats are popped up with a couple of Stampin' Dimensionals - the spots on the left cat are stamped in Smoky Slate, the other cat's bow is colored with Dark Mango Melody Blends and Clear Wink of Stella. The Wood Textures hearts are just punched and die-cut.
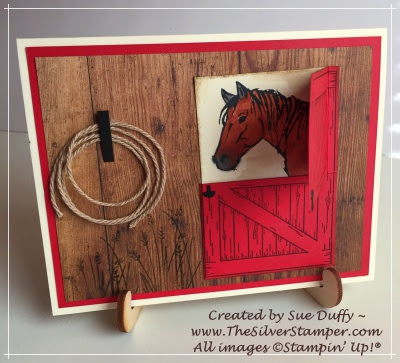
I think these pet pairs are perfect for anniversary cards and, of course, you can use the same technique with the Happy Tails Bundle* - which I am thrilled will be carried over, but not as a Bundle - so if you want to save 10%, order the Happy Tails Bundle before the end of May! I will also show it below.
Products


 Designer Series Paper")


Comments
Post a Comment